

Paint Your Easter Eggs with Watercolor for Better Results
Create Artistic Easter Eggs with Easy Designs
Watercolors are a popular choice for painting eggs. They offer a translucent and delicate effect, perfect for creating soft and ethereal designs.
While dying eggs may be fun, it’s far from artistic. However, with watercolors, painting hard boiled eggs can become true works of art!
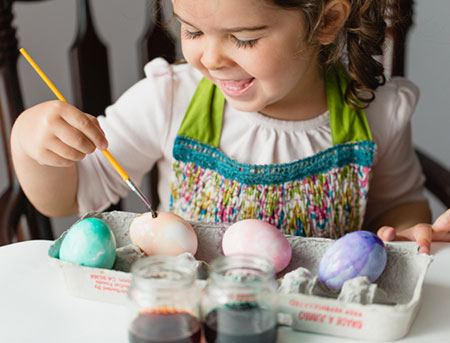
Using watercolor paints and watercolor pencils, you can now create fantastic designs, patters and scenes easily. It is a great project for kids to share in without the mess of all those messy dyes.
Materials:
Watercolor paints
Paintbrushes (variety of sizes)
Watercolor paper or a thick paper that can handle water
Water container
Paper towels or a cloth
Hardboiled eggs, and a smaller watercolor brush (we’ve found that Rounds work the best).
Directions:
Step 1: Draw the outline Using a pencil, lightly sketch the outline of an egg shape on your watercolor paper. You can make it as simple or detailed as you like.
Lay down a nice background with soft, bright colors on your hardboiled egg. The watercolors should spread on easily, especially if you’re painting with Turner Artist Watercolors, or Winsor and Newton Watercolor Paints.
Step 2: Apply the base colors Choose a light color for the base of your egg. Load your brush with the chosen color and start applying it to the damp egg shape, covering the entire area. Remember to work quickly to avoid drying.
While your paint is still wet, add in designs with either your watercolor paints or watercolor pencils for especially fine details. If you let the colors drip, you can create a wash and see the colors disperse in neat ways that you can’t get with dye.
Step 4: Add shading and highlights While the base color is still wet, add darker shades of the same color to create depth and shadows. You can also use a lighter color to create highlights and reflections. Experiment with blending colors to achieve the desired effect.
Step 5: Let them dry and enjoy! Allow the paint to dry completely. You can use a hairdryer on a low setting to speed up the drying process if desired.
Step 6: Details and textures – Once the base layer is dry, you can add details and textures to your painted egg. Use a smaller brush and various watercolor techniques like dry brushing, splattering, or lifting color to create texture and interest.
Fun tips:
- Mix wet paints together to get a fun, marbled look.
- Dip the eggs in water, and while wet, add watercolors to them to make fun swirls.
- If using watercolor pencils, be sure to go lightly on them so as not to crack the egg shell.
- Find everyday items with irregular textures to remove paint from your eggs (with a watercolor wash) such as crinkled up newspaper or a plastic bag.

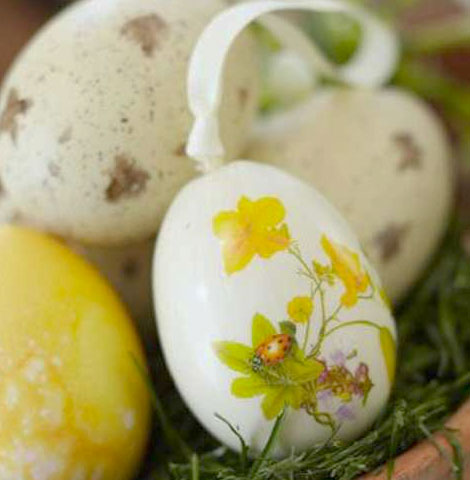
And there you have it!
A watercolor-painted egg. Enjoy your creative process and have fun experimenting with colors and techniques!
Disclaimer: some watercolor paints contain lead and other dangerous to consume materials. So please, do not eat these painted eggs, but feel free to enjoy them for their aesthetic beauty.
Want Even More Effects! Try a Set of Turner Pearl Colors!
You may also like...
-

Different Types of Watercolor Paper and Their Unique Qualities
Exploring the Different Types of Watercolor Paper and Their Unique Qualities When it comes to watercolor... -

Unbox & Swatch Daniel Smith Mixing Set of 15 Watercolors
Unbox & Swatch We are proud to carry the exceptional line of Daniel Smith Watercolor Paints.... -

Artist 0073.UV Artist Spotlight | Turner Watercolors Review
Artist 0073.UV is a watercolorist and illustrator creating on-trend portraiture in a vivid contemporary pop art...