How To Clean Your Art Paint Brush
A Quick Tutorial on best practices for cleaning and making your art brushes last longer!

Taking excellent care of your paintbrushes is important. Artist brushes are likely one of the greatest investments you will make when purchasing art supplies, so cleaning paint brushes after each use is vital to your painting experience. If you properly care for your brushes, they can last for decades.
Cleaning your brushes at the end of each painting session does take time, but the effort is always worth it. Here are some easy ways to properly clean brushes, thereby protecting your investment.
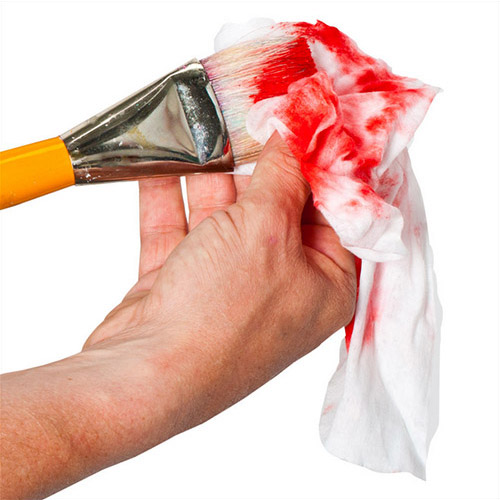
It seems like a no brainer, I know… But always clean your brush immediately after use. Especially where acrylics are concerned, the more time the paint is left to dry in the brush, the harder it will be to clean out of the bristles. With Acrylics in particular, this is especially true because the resins can harden into the pores of brushes (especially natural bristles) and will be unable to be removed, after a certain point. If you’re going for a quick clean, use SoHo Studio Wipes (pictured above). They will work especially well with acrylics or oils. They have a gentle, effective cleanser that can easily pull the paint right off of your brush. They are disposable and easy to use for a quick cleaning.  With acrylics, use these first to remove the majority of the paint, then rinse brushes well with water. This will remove any residue from the studio wipes, so it will not mix with new paint.
Watercolor is the easiest painting medium to clean brushes with. Although watercolor can be reconstituted with water (and easily removed) if it dries in the brush while working, it is still smart to always rinse the color from your brush as soon as you are done with it, to prevent staining. With watercolor, work your brush clean first in a designated rinse water bucket and then briefly swish in a fresh water bucket, to remove the colored rinse water.
Even though oil paints have a slower drying time, if you neglect cleaning them after each color use or at the end of each painting session, even the nicest brushes will be ready for the ole’ trash can, after repeated neglect. Wipe excess oil paint from the brush with a SoHo Wipe or cotton rag*, and then clean the residual pigment out of the brush in a brush washer filled with solvent or mineral spirits. Blot the excess solvent thoroughly on a paper towel or clean rag. Set aside any brushes you use during the painting session after cleaning then in the brush washer, for a more thorough cleaning at the end of the painting session.
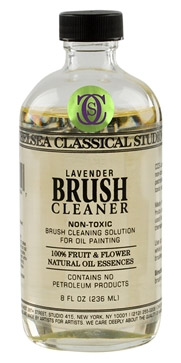
For a more thorough cleaning of oil painting brushes when you are finished with a color, Jerrys offers many solvents for cleaning up your brushes and palette knives. However, one of the best ones hands down is the new Chelsea Classical Studio Lavender Brush Cleaner. It is a safer, natural alternative to turpentine that works just as well, but without all of the harmful odors and toxic chemicals, and a pleasant lavender smell. For oils, you definitely want to try the lavender brush cleaner or mineral spirits. Fill a metal brush cleaner, Silicoil, or other brush cleaning system (that allows silt from cleaning to drop beneath the submerged cleaning grate or surface) with your solvent of choice. Carefully drag your brush back and forth across the grate at an angle, being careful to not point tips down into the grate where they can be damaged by the slow and steady pressure as you wand the brush, back and forth. Check brush periodically to see if the pigment residue has been removed, and blot on a clean cotton rag* (old ratty or holy T-shirts are perfect for this) for additional residue. Keep cleaning until the brush comes up free of debris. Use precaution and don’t allow solvents of any type to splash onto your skin while working. Rags can be dipped into solvent and used to wipe tools clean of paint, as well.
Once your painting session is done in ANY medium, it is important to clean every brush used with a brush soap (especially natural hair brushes) that will replace oils in the bristles, and help the brush remember its’ natural shape. With synthetic brushes this is can be done with gentle dish soap, but if you paint in multiple mediums, it is just easier to always use the same thing (dish soap will strip and damage natural hair brushes). Good recommendations for brush cleaners that will remove even oil paints, yet condition natural brushes are Chelsea Classical Studio Lavender and Olive Oil Soap, Jack’s Linseed Studio Soap, and Master’s Brush Cleaner. At the sink, wet the brush with warm water and gently swirl it into the soap, until it picks up soap into the brush. Sweep brush back and forth in the palm of your hand, working the soap deep into the bristles, and up into the ferrule if the paint was worked up into there during your painting session. Be sure to never mash the bristles into your palm, and sweep the brush back and forth at a 45 degree angle to avoid damaging the tip. Clean your brush repeatedly until it rinses clean in warm tap water, and re-apply fresh soap when necessary.

A good tip for when you finish washing your brush out: gently blot the excess water on a paper towel or a soft, lint free cloth, and shape the bristles by hand to the original shape of the brush. To dry the brush, you can either store the brush bristle-side-down (vertically) in a brush washer drying rack to let it dry and let any remaining water or solvent fall back into the container, which sometimes helps softer brushes like watercolor or Sumi-E brushes maintain shape. For most brushes, however, this is unnecessary. Simply blotting the excess water out and reshaping the brush will allow the brush to be placed horizontally to dry on a table, or back in the brush bin or vase they are normally housed in.
Unfortunately, cleaning brushes is a necessary evil, and to most painters, the most dreaded part of the painting experience. However, with the right solvents and cleaners, you can keep your brushes in perfect working condition in half the time, and protect your investment, to boot.
(*Please note: when using cotton rags, paper towels, or any absorbent item to clean solvents or oil paint, the used rags and items are considered combustible and should be stored in a sealed metal can or container after your painting session, to avoid spontaneously combusting under the right circumstances. Store sealed containers outside, and dispose of properly (checking with your county or state regulations). Always make safety top priority in your studio!)


